Mobile apps often need to display long lists of items to users. These could contain images, text or other custom components. Every mobile platform has its unique set of components and concepts for displaying such lists and Windows Phone is no exception. In this tutorial I will show you how to make your own customized list of items, change the order of these lists, display options, and add items programmatically.
You can download the full project from GitHub.
Getting Started
Create a project in Visual Studio and add a MainPage to switch between our ListView and GridView views by adding two buttons to the .xaml file that will take us to the corresponding pages.
<Button x:Name="listViewButton" Content="List View" Grid.Row="0"/>

<Button x:Name="gridViewButton" Content="Grid View" Grid.Row="1"/>
Now create these two pages and name them GridViewPage and ListViewPage. Next we need to create the connections between the pages and buttons.
In the design view of the MainPage, double clicking the buttons will generate the onClick events and the xaml and C# code will be added automatically.
The code for the buttons should be the following.
<Button x:Name="listViewButton" Content="List View" Grid.Row="0" Click="listViewButton_Click" />

<Button x:Name="gridViewButton" Content="Grid View" Grid.Row="1" Click="gridViewButton_Click" />
If you open MainPage.xaml.cs you will see the two methods generated above. Inside these we need to call Frame.Navigate to change pages.
private void listViewButton_Click(object sender, RoutedEventArgs e)
{
    Frame.Navigate(typeof(ListViewPage));
}

private void gridViewButton_Click(object sender, RoutedEventArgs e)
{
    Frame.Navigate(typeof(GridViewPage));
}
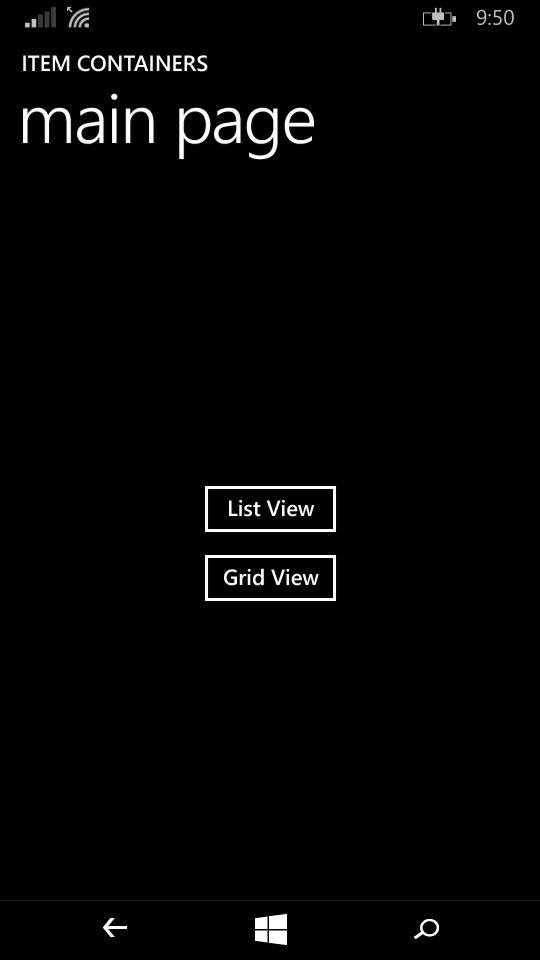
MainPage is now complete and should look like the below, allowing you to switch between pages.
Items
Behind every list layout are the items that constitute an entry in the list. For example, in a contacts list there might be the name of a contact, a phone number, a picture, email, etc.
For our ListView I will add the following items to create a contact entry.
class ListViewItem
{
    public SolidColorBrush color { get; set; }
    public string firstName { get; set; }
    public string lastName { get; set; }
    public string mobileNumber { get; set; }
}
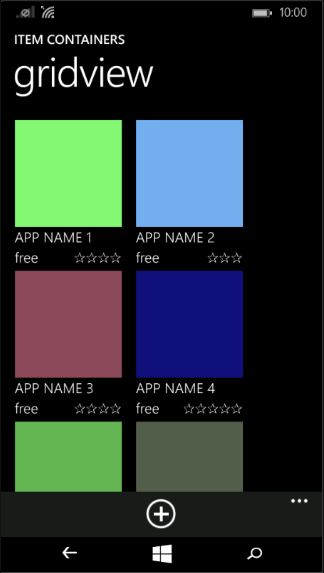
For the GridView we will create a clone of the Windows store. It’s a perfect example of displaying items inside a grid.
class GridViewItem
{
    public SolidColorBrush color { get; set; }
    public string name { get; set; }
    public string price { get; set; }
    public string rate { get; set; }
}
I have used colors instead of pictures and hopefully this is clear enough. Make sure you add using Windows.UI.Xaml.Media; as a dependency for the SolidColorBrush in both classes. get and set can be thought of as read/write permissions for each of the parameters.
Move ListViewItem.cs and GridViewItem.cs into a new Items folder for a cleaner project structure.
Models
To control our list of items we are going to use models, which are the bridge between code and design. If we want to make changes to the items displayed, we shouldn’t change the .xaml file but instead change the item in our model and the rest will be handled at run-time.
Create ListViewModel.cs and GridViewModel.cs and move them into a folder called Models.
To create a list of items, we need an ObservableCollection from System.Collections.ObjectModel to hold the items. It’s the same as a simple list, but binds the items. This type of collection is the key to changing elements dynamically as it inherits from INotifyCollectionChanged, and INotifyPropertyChanged.
In ListViewModel.cs add:
public static ObservableCollection<ListViewItem> ListViewItems { get; set; }
private static Random random;
Random is a data type to generate random values for color, mobile number, and rate. In the constructor we initialize both ListViewItems and random.
public ListViewModel()
{
    ListViewItems = new ObservableCollection<ListViewItem>();
    random = new Random();
}
To add items we need a method that will create an item of type ListViewItem and add it to the collection.
public static void AddItem()
{
    ListViewItems.Add(new ListViewItem() {
        firstName = "Contact",
        lastName = (ListViewItems.Count + 1).ToString(),
        mobileNumber = "+355-" + random.Next(10, 100) + "-" + random.Next(10,100) + "-" + random.Next(10,100) + "-" + +random.Next(100, 1000),
        color = new SolidColorBrush(new Color() {
            A = 255,
            R = (byte)random.Next(255),
            G = (byte)random.Next(255),
            B = (byte)random.Next(255),
        })
    });
}
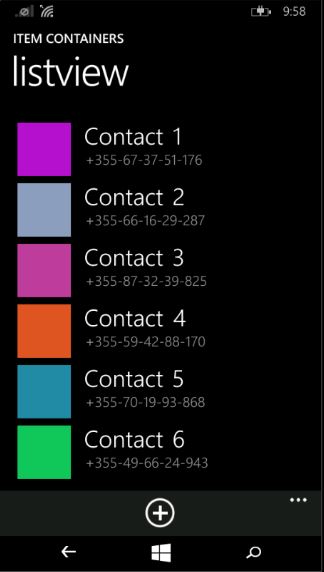
The values above are intentionally kept simple for demonstration purposes. You can see that all contacts have the same first name, have a number as lastname, a random mobileNumber and color value.
Note: This method is static because when binding the elements of the container to a ListView, an instance of the class is created, so to add elements to this instance we don’t need to create a new object.
In the same way we define the model for GridView:
class GridViewModel
{
    public static ObservableCollection<GridViewItem> GridViewItems { get; set; }
    private static Random random;

    public GridViewModel()
    {
        GridViewItems = new ObservableCollection<GridViewItem>();
        random = new Random();
    }

    public static void AddItem()
    {
        GridViewItems.Add(new GridViewItem()
        {
            name = "APP NAME " + (GridViewItems.Count + 1),
            price = "free",
            rate = AddStars(random.Next(1,6)),
            color = new SolidColorBrush(new Color()
            {
                A = 255,
                R = (byte)random.Next(255),
                G = (byte)random.Next(255),
                B = (byte)random.Next(255),
            })
        });
    }

    private static string AddStars(int v)
    {
        string s = "";
        for (int i = 0; i < v; i++)
            s += "✰";

        return s;
    }
}
We need one last model for this project (I will explain why soon), which includes both of the models specified above. I have called it ViewModel and it contains an object of type ListViewModel, and an object of type GridViewModel.
class ViewModel
{
    public ListViewModel listViewModel { get; set; }
    public GridViewModel gridViewModel { get; set; }

    public ViewModel()
    {
        listViewModel = new ListViewModel();
        gridViewModel = new GridViewModel();
    }
}
Data Templates
We want to make sure our lists are presented in an attractive way and for this we need to specify a common template for our data in a list or grid. Templates are characteristic of views containing items, like ListView and GridView.
Add the following to the corresponding .xaml files.
<ListView x:Name="listView" />
and
<GridView x:Name="gridView" />
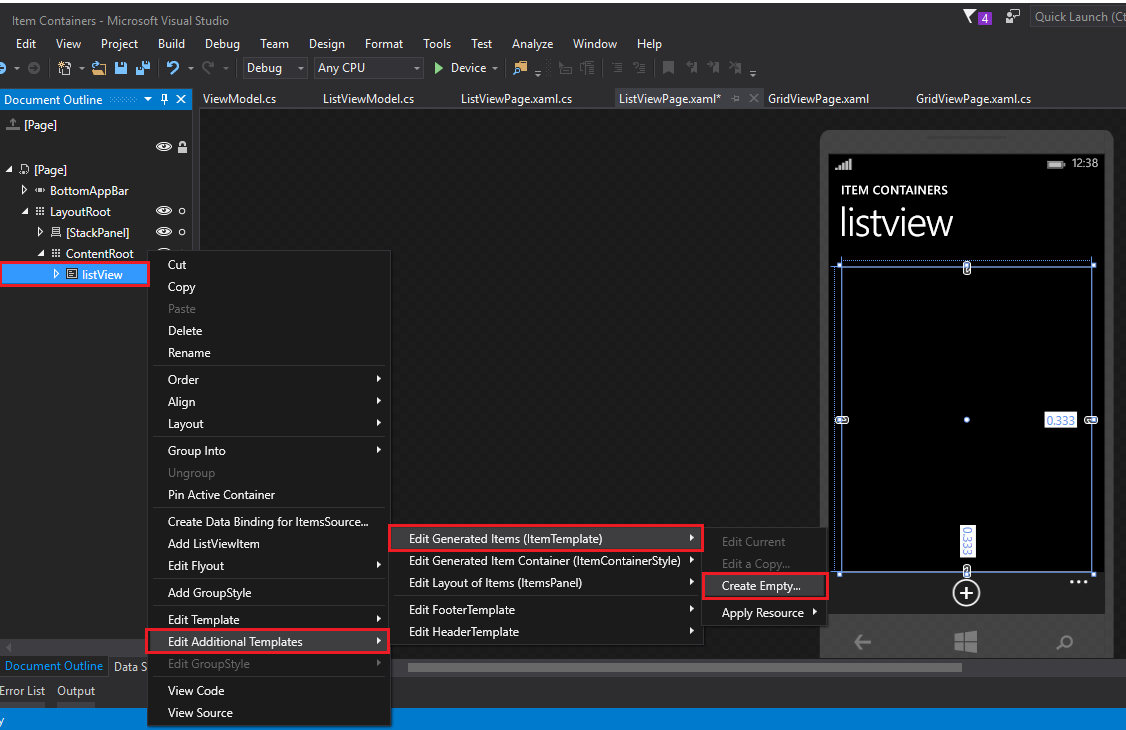
An easy way to add an ItemTemplate to these views is from the Design View. Right-click on the View and select Edit Additional Templates -> Edit Generated Templates (Item Template) -> Create Empty….
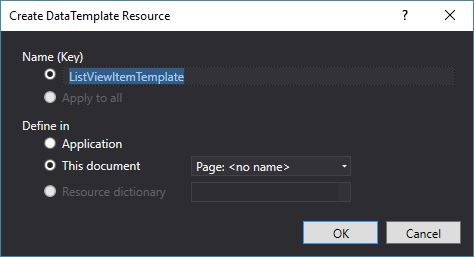
Name it ListViewItemTemplate or GridViewDataTemplate and make sure it’s defined inside the document.
When you click Ok, the View tag will update with the following line.
ItemTemplate="{StaticResource ListViewDataTemplate}"
You will see the following code inside the Page tags.
</Page.Resources>
    <DataTemplate x:Key="ListViewItemTemplate">
        <Grid/>
    </DataTemplate>
</Page.Resources>
Replace <Grid/> with:
<Grid>
    <Grid.RowDefinitions>
        <RowDefinition Height="Auto"/>
        <RowDefinition Height="Auto"/>
    </Grid.RowDefinitions>
    <Grid.ColumnDefinitions>
        <ColumnDefinition Width="Auto"/>
        <ColumnDefinition/>
    </Grid.ColumnDefinitions>

    <Rectangle Height="75" Width="75" Grid.RowSpan="2" Fill="{Binding color}" Margin="5"/>
    <StackPanel Orientation="Horizontal" Grid.Column="1" VerticalAlignment="Bottom">
        <TextBlock x:Name="firstNameTB" TextWrapping="Wrap" Margin="15,0" Style="{StaticResource ListViewItemTextBlockStyle}" Text="{Binding firstName}" FontSize="33.333"/>
        <TextBlock x:Name="lastNameTB" TextWrapping="Wrap" Text="{Binding lastName}" Style="{StaticResource ListViewItemTextBlockStyle}" FontSize="33.333"/>
    </StackPanel>
    <TextBlock x:Name="numberTB" TextWrapping="Wrap" Text="{Binding mobileNumber}" Grid.Row="1" Grid.Column="1" Style="{StaticResource ListViewItemSubheaderTextBlockStyle}" VerticalAlignment="Top" Margin="15,0,0,0" FontSize="20"/>
</Grid>
And replace GridViewItemTemplate with the following:
<Grid Width="170">
    <Grid.RowDefinitions>
        <RowDefinition Height="Auto"/>
        <RowDefinition Height="Auto"/>
        <RowDefinition/>
    </Grid.RowDefinitions>
    <Grid.ColumnDefinitions>
        <ColumnDefinition/>
    </Grid.ColumnDefinitions>
    <Rectangle Height="150" Width="150" Fill="{Binding color}" Margin="0,0,20,0" HorizontalAlignment="Left" VerticalAlignment="Top"/>
    <TextBlock x:Name="nameTB" Style="{StaticResource ListViewItemTextBlockStyle}" FontSize="20" Text="{Binding name}" Grid.Row="1" HorizontalAlignment="Left" VerticalAlignment="Center" TextWrapping="WrapWholeWords"/>
    <TextBlock x:Name="priceTB" TextWrapping="Wrap" Style="{StaticResource ListViewItemTextBlockStyle}" FontSize="20" Text="{Binding price}" Grid.Row="2" HorizontalAlignment="Left" Margin="0,0,0,5"/>
    <TextBlock x:Name="ratingTB" TextWrapping="Wrap" Grid.Row="2" Style="{StaticResource ListViewItemContentTextBlockStyle}" FontSize="20" Text="{Binding rate}" HorizontalAlignment="Right" Margin="0,0,20,5"/>
</Grid>
Notice I have used ‘binding’ in several tags, but how does the tag know which property to bind to? To tell the compiler that {Binding name} should equal the name of the app we need to add a DataContext to the page.
<Page.DataContext>
    <local:ViewModel />
</Page.DataContext>
ViewModel is used as a common model, because in some cases we may need to implement both a GridView and a ListView in the same page, but there can be only one DataContext.
Adding items
We have code in place for adding list items, but haven’t yet presented the option to users. To do this, after the PageResources tag add an AppBarButton:
<Page.BottomAppBar>
    <CommandBar>
        <AppBarButton Icon="Add" Label="Add item" Click="AppBarButton_Click"/>
    </CommandBar>
</Page.BottomAppBar>
We have a click event on the button which sets the handler in the .xaml.cs file.
private void AddAppBarButton_Click(object sender, RoutedEventArgs e)
{
    ListViewModel.AddItem();
}
The same needs to be added to the GridView where the call is GridViewModel.AddItem();
The last step is telling the view where to get the items from so it can display them with the template specified. Inside the ListView or GridView tag add the corresponding items source.
ItemsSource="{Binding listViewModel.ListViewItems}"
and
ItemsSource="{Binding gridViewModel.ListViewItems}"
Run the project to see the result so far. You should be able to add items.
Reordering items
Sometimes you might want to be able reorder items in a list. This requires a few changes to the view.
First, add the following attributes to the ListView and GridView.
CanReorderItems="True" CanDragItems="True" AllowDrop="True"
The first adds the possibility to change the order of items, but on a device you have to drag the item and drop it in the new position, so the attributes should be set to true. For Windows devices this is enough, but on Windows Phone this won’t work because the reordering mode is disabled by default.
I have added two event handlers, Holding and Tapped. The first is used to enable reordering mode when the user holds one of the items and the second will disable it, snapping items in place.
The code for listview is:
private void listView_Holding(object sender, HoldingRoutedEventArgs e)
{
    listView.ReorderMode = ListViewReorderMode.Enabled;
}

private void listView_Tapped(object sender, TappedRoutedEventArgs e)
{
    listView.ReorderMode = ListViewReorderMode.Disabled;
}
and for gridview:
private void listView_Holding(object sender, HoldingRoutedEventArgs e)
{
    gridView.ReorderMode = ListViewReorderMode.Enabled;
}

private void listView_Tapped(object sender, TappedRoutedEventArgs e)
{
    gridView.ReorderMode = ListViewReorderMode.Disabled;
}
Run and test by holding an item until it starts floating. Then hold the item again to drag it anywhere. After positioning, tap any item to finish.

Conclusion
As you can see, the results look good. GridViews and ListViews make it simple to have large numbers of items displayed in an elegant way. This tutorial needed several steps to get started, but building lists in the future will be quicker and simpler and are an essential part of many apps.
Thank you for your time. May Code be with you!