Almost all apps will need to store data of some form. Maybe you need to save user preferences, progress in a game, or offline data so your app can work without a network connection. Developers have a lot of options for managing data in iOS apps, from Core Data to cloud based storage, but one elegant and reliable local storage option is SQLite.
In this tutorial I will show you how to add SQLite support to your app. You can find the final source code on GitHub.
Getting Started
The SQLite library is written in C, and all queries happen as calls to C functions. This makes it challenging to use, as you have to be aware of pointers and data types etc. To help, you can make use of Objective-C or Swift wrappers to serve as an adapter layer.
A popular choice is FMDB, an Objective-C wrapper around SQLite. Its easy to use, but personally I prefer to not use hard-coded SQL (Structured Query Language) commands. For this tutorial, I will use SQLite.swift to create a basic contact list.
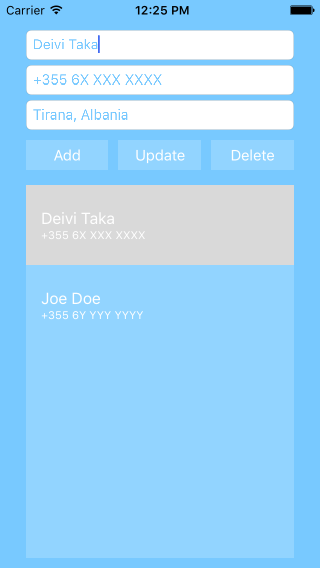
First, create a new single view project in Xcode (SQLite.swift requires Swift 2 and Xcode 7 or greater). I created a ViewController in Main.storyboard that looks like the below. Create your own similar layout, or download the storyboard files here.
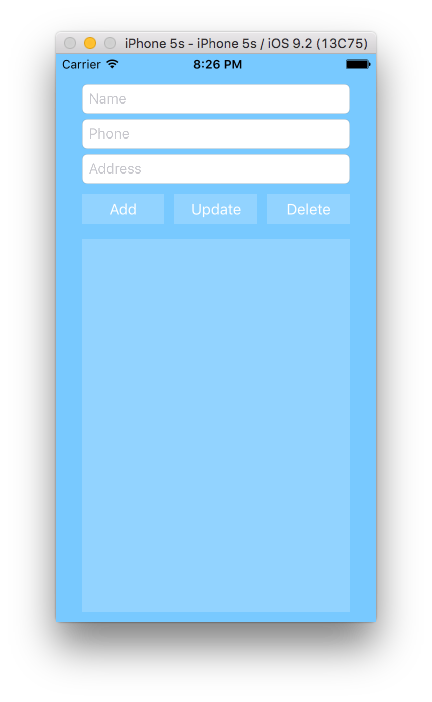
At the bottom is a TableView which will hold the contacts.
Installation
You can install SQLite.swift with Carthage, CocoaPods, or manually.
The Model
Create a new Swift file / class named Contact.swift, it contains three properties and initializers to keep it simple.
import Foundation

class Contact {
    let id: Int64?
    var name: String
    var phone: String
    var address: String

    init(id: Int64) {
        self.id = id
        name = ""
        phone = ""
        address = ""
    }

    init(id: Int64, name: String, phone: String, address: String) {
        self.id = id
        self.name = name
        self.phone = phone
        self.address = address
    }
}
The id is required as a parameter when creating an object, so you can reference it in the database later.
Connecting the User Interface
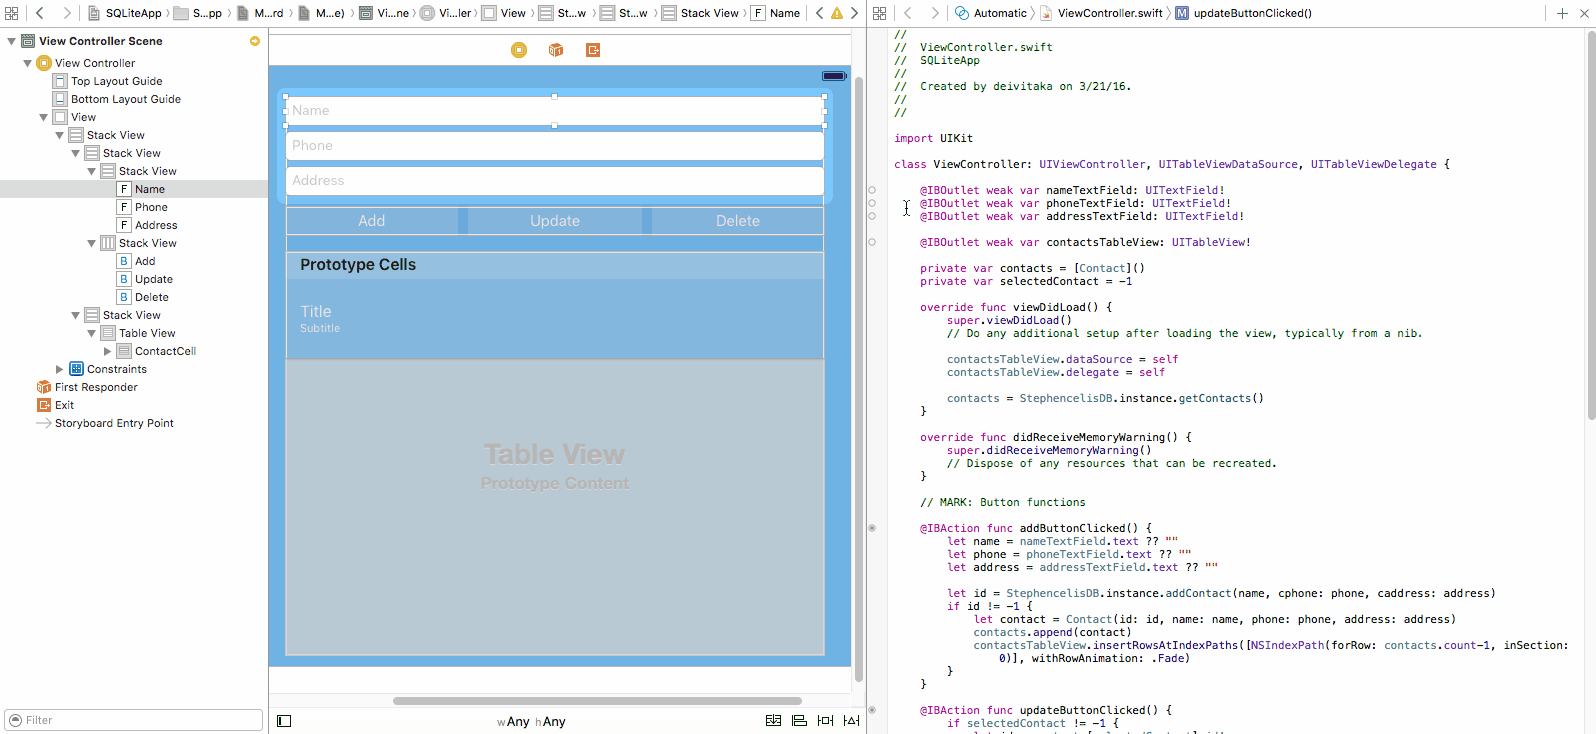
In ViewController.swift make the class implement UITableViewDelegate and UITableViewSource protocols.
class ViewController: UIViewController, UITableViewDataSource, UITableViewDelegate {
   ...
}
Connect the following IOutlets with their corresponding views by dragging or manually adding them in code.
@IBOutlet weak var nameTextField: UITextField!
@IBOutlet weak var phoneTextField: UITextField!
@IBOutlet weak var addressTextField: UITextField!

@IBOutlet weak var contactsTableView: UITableView!
Now you will need a list of contacts, and an index for the contact selected from the list.
private var contacts = [Contact]()
private var selectedContact: Int?
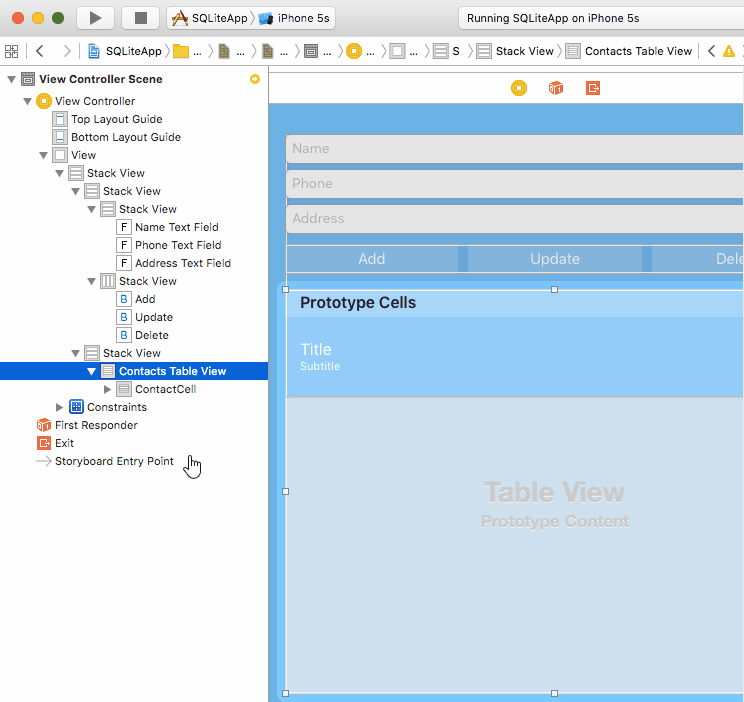
Link the DataSource and Delegate of the UITableView with the UIViewController in the storyboard.
Or by adding the following lines into the viewDidLoad() method of ViewController.swift.
contactsTableView.dataSource = self
contactsTableView.delegate = self
To insert, update and remove elements from the UITableView you need to implement three basic methods from the protocols mentioned above.
The first will fill the UITextFields with the corresponding contact information from a selected contact. Yt will then save the row that represents this contact in the table.
func tableView(tableView: UITableView, didSelectRowAtIndexPath indexPath: NSIndexPath) {
    nameTextField.text = contacts[indexPath.row].name
    phoneTextField.text = contacts[indexPath.row].phone
    addressTextField.text = contacts[indexPath.row].address

    selectedContact = indexPath.row
}
The next function tells the UITableViewDataSource how many cells of data it should load. For now, it will be zero since the array is empty.
func tableView(tableView: UITableView, numberOfRowsInSection section: Int) -> Int {
    return contacts.count
}
The last function returns a specific UITableViewCell for each row. First get the cell using the identifier, then its child views using their tag. Make sure that the identifiers match your element names.
func tableView(tableView: UITableView, cellForRowAtIndexPath indexPath: NSIndexPath) -> UITableViewCell {

    let cell = tableView.dequeueReusableCellWithIdentifier("ContactCell")!
    var label: UILabel
    label = cell.viewWithTag(1) as! UILabel // Name label
    label.text = contacts[indexPath.row].name

    label = cell.viewWithTag(2) as! UILabel // Phone label
    label.text = contacts[indexPath.row].phone

    return cell
}
The app can now run, but there is no ability to add or edit contacts yet. To do this link the following IBActions with the corresponding buttons.
@IBAction func addButtonClicked() {
    let name = nameTextField.text ?? ""
    let phone = phoneTextField.text ?? ""
    let address = addressTextField.text ?? ""

    let contact = Contact(id: 0, name: name, phone: phone, address: address)
    contacts.append(contact)
    contactsTableView.insertRowsAtIndexPaths([NSIndexPath(forRow: contacts.count-1, inSection: 0)], withRowAnimation: .Fade)
}
Here you take the values of the UITextFields, and create an object which is added to the contacts list. The id is set to 0, since you haven’t implemented the database yet. The function insertRowsAtIndexPaths() takes as arguments an array of indexes of the rows that will be affected, and the animation to perform with the change.
@IBAction func updateButtonClicked() {
    if selectedContact != nil {
        let id = contacts[selectedContact].id!
        let contact = Contact(
            id: id,
            name: nameTextField.text ?? "",
            phone: phoneTextField.text ?? "",
            address: addressTextField.text ?? "")

            contacts.removeAtIndex(selectedContact!)
                contacts.insert(contact, atIndex: selectedContact!)

        contactsTableView.reloadData()
    } else {
    print("No item selected")
    }
}
In this function you create a new Contact, and delete and re-insert in the same index of the list to make the replacement. The function doesn’t currently check to see if the data has changed.
@IBAction func deleteButtonClicked() {
    if selectedContact != nil {
        contacts.removeAtIndex(selectedContact)

        contactsTableView.deleteRowsAtIndexPaths([NSIndexPath(forRow: selectedContact, inSection: 0)], withRowAnimation: .Fade)
    } else {
    print("No item selected")
    }
}
The last function removes the contact selected and refreshes the table.
At this point the application works, but will lose all changes when relaunched.
Creating a Database
Now time to manage the database. Create a new swift file / class named StephencelisDB.swift and import the SQLite library.
import SQLite

class StephencelisDB {
}
First, initialize an instance of the class, using the ‘Singleton’ pattern. Then, declare an object of type Connection, which is the actual database object you will call.
static let instance = StephencelisDB()
private let db: Connection?
The other declarations are the table of contacts, and its column with a specific type.
private let contacts = Table("contacts")
private let id = Expression<Int64>("id")
private let name = Expression<String?>("name")
private let phone = Expression<String>("phone")
private let address = Expression<String>("address")
The constructor tries to open a connection with the database which has a specified name, and a path to the application data, and then creates the tables.
private init() {
    let path = NSSearchPathForDirectoriesInDomains(
        .DocumentDirectory, .UserDomainMask, true
        ).first!

    do {
        db = try Connection("\(path)/Stephencelis.sqlite3")
    } catch {
        db = nil
        print ("Unable to open database")
    }

    createTable()
}

func createTable() {
    do {
        try db!.run(contacts.create(ifNotExists: true) { table in
        table.column(id, primaryKey: true)
        table.column(name)
        table.column(phone, unique: true)
        table.column(address)
        })
    } catch {
        print("Unable to create table")
    }
}
Notice there is no SQL code to create the table and columns. This is the power of the wrapper used. With a few lines of code you have the database ready.
CRUD Operations
For those unfamiliar with the term, ‘CRUD’ is an acronym for Create-Read-Update-Delete. Next, add the four methods to the database class that perform these operations.
func addContact(cname: String, cphone: String, caddress: String) -> Int64? {
    do {
        let insert = contacts.insert(name <- cname, phone <- cphone, address <- caddress)
        let id = try db!.run(insert)

        return id
    } catch {
        print("Insert failed")
        return -1
    }
}
The <- operator assigns values to the corresponding columns as you would in a normal query. The run method will execute these queries and statements. The id of the row inserted is returned from the method.
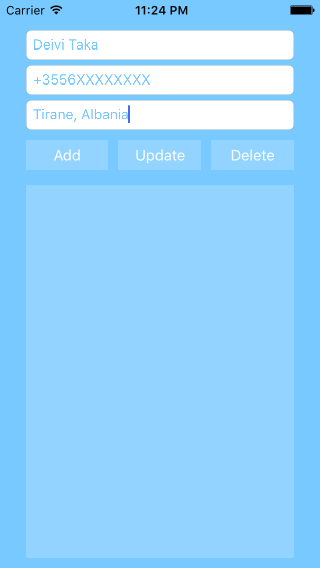
Add print(insert.asSQL()) to see the executed query itself:
INSERT INTO "contacts" ("name", "phone", "address") VALUES ('Deivi Taka', '+355 6X XXX XXXX', 'Tirana, Albania')
If you want to undertake further debugging you can use a method instead. The prepare method returns a list of all the rows in the specified table. You loop through these rows and create an array of Contact objects with the column content as parameters. If this operation fails, an empty list is returned.
func getContacts() -> [Contact] {
    var contacts = [Contact]()

    do {
        for contact in try db!.prepare(self.contacts) {
            contacts.append(Contact(
            id: contact[id],
            name: contact[name]!,
            phone: contact[phone],
            address: contact[address]))
        }
    } catch {
        print("Select failed")
    }

    return contacts
}
For deleting items, find the item with a given id, and remove it from the table.
func deleteContact(cid: Int64) -> Bool {
    do {
        let contact = contacts.filter(id == cid)
        try db!.run(contact.delete())
        return true
    } catch {
        print("Delete failed")
    }
    return false
}
You can delete more than one item at once by filtering results to a certain column value.
Updating has similar logic.
func updateContact(cid:Int64, newContact: Contact) -> Bool {
    let contact = contacts.filter(id == cid)
    do {
        let update = contact.update([
            name <- newContact.name,
            phone <- newContact.phone,
            address <- newContact.address
            ])
        if try db!.run(update) > 0 {
            return true
        }
    } catch {
        print("Update failed: \(error)")
    }

    return false
}
Final Changes
After setting up the database managing class, there are some remaining changes needed to Viewcontroller.swift.
First, when the view is loaded get the previously saved contacts.
contacts = StephencelisDB.instance.getContacts()
The tableview methods you prepared earlier will display the saved contacts without adding anything else.
Inside addButtonClicked, call the method to add a contact to the database. Then update the tableview only if the method returned a valid id.
if let id = StephencelisDB.instance.addContact(name, cphone: phone, caddress: address) {
    // Add contact in the tableview
    ...
}
In a similar way, call these methods inside updateButtonClicked and deleteButtonClicked.
...
StephencelisDB.instance.updateContact(id, newContact: contact)
...
StephencelisDB.instance.deleteContact(contacts[selectedContact].id!)
...
Run the app and try to perform some actions. Below are two screenshots of how it should look. To update or delete a contact it must first be selected.
Any Queries?
SQLite is a good choice for working with local data, and is used by many apps and games. Wrappers like SQLite.swift make the implementation easier by avoiding the use of hardcoded SQL queries. If you need to store data in your app and don’t want to have to handle more complex options then SQLite i worth considering.
May the Code be with you!